Design and Content
Homepage logo - Upload your company logo. This will appear in the top left of your web shop and on order confirmation emails. Uploaded logos will resize to fit the different themes however we recommend you follow the below guidelines for each theme.
Themes 1 & 3 - 650px wide by 130px deep (72 dpi)
Theme 2 - 270px wide by 200px deep (72 dpi)
Templates - Choose from three different themes for your website. If you want to embed your web shop within an existing website, choose template 3. The process for embedding Your Web Shop in an existing website is covered here
Content pages - Each web shop allows you to add up to 7 content pages (including the homepage) that can be customised using a built WYSIWYG editor. You can edit the names of these pages if for example you wanted to display a page called 'Client Testimonials' instead of 'Cookies Policy'. You can also choose how the pages are ordered on your website using ‘Display Order’ – simply add a number between 1-7 to define which position you would like each page.
The content editor allows you to add text/imagery and format its position on page. Alternatively, should you wish to apply a more complex design, you can insert HTML code directly by selecting the <> icon from the editor menu. Simply paste in the html from notepad and click save.
Bear in mind that each theme has a different site width so images for theme 1 will need to be sized differently to theme 2. There are no height restrictions on either of the sites.
SEO Tools – Each content page allows you to add custom meta data. This lets you redefine how the pages of your website is read by search engines and displayed on the search engine results page. Search engines take this information into account when ranking websites.
Adding a Custom Homepage
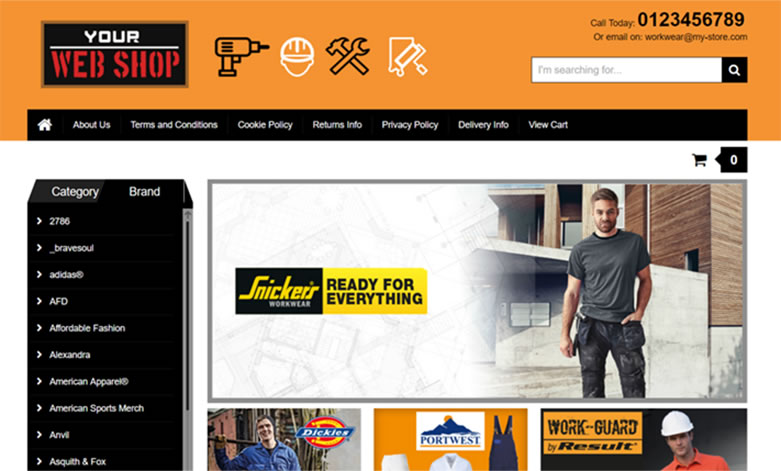
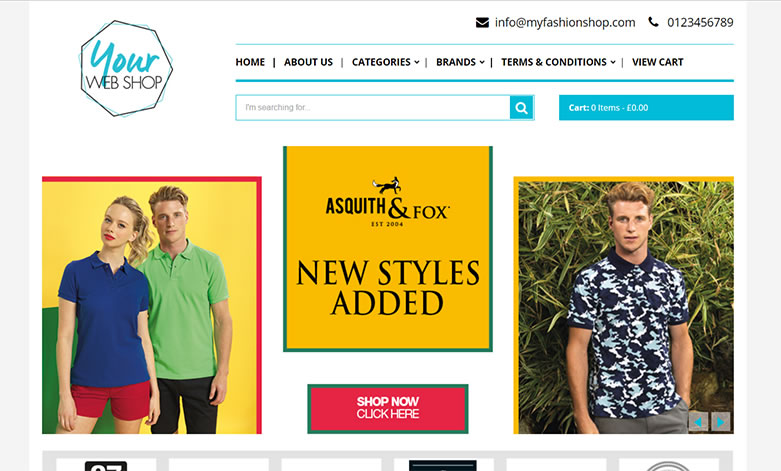
The following examples illustrate each theme. To customise the homepage as per the examples below, go to design & content - content pages - homepage.
- The main banner on theme 1 below is 840px x 350px
- The main banner on theme 2 below is 1080px x 450px
|
Theme 1 Theme 2 |
If you do not wish to customise the homepage, you can check the box for 'Display Homepage Category Images'. This will fill the empty space with a list of category images.
Uploading an Image
To upload an image, click the ![]() icon. This will allow you to browse for an image on your computer and upload it to the page. Once the image is uploaded, you can re size it by clicking the image and dragging the image as necessary.
icon. This will allow you to browse for an image on your computer and upload it to the page. Once the image is uploaded, you can re size it by clicking the image and dragging the image as necessary.
Linking an Image to a Specific Page
To link an image to a specific page of your web shop, click the image followed by the ![]() button. A pop up will now appear that allows you to specify a link. Unless you are linking to an external page outside of your web shop, you only need specify the page element of the URL. The example below is a link through to the category 'Bags'.
button. A pop up will now appear that allows you to specify a link. Unless you are linking to an external page outside of your web shop, you only need specify the page element of the URL. The example below is a link through to the category 'Bags'.
e.g. /shop/category/athleisurewear?pcid=503
Footer Page - We have supplied you with two footer designs that can be uploaded to your web shop. The files are called 'Theme 1 Footer' and 'Theme 2 Footer'. These designs are illustrated below:
Theme 1 Footer
To view the html for this footer design, click here.
Theme 2 Footer

To view the html for this footer design, click here.
Simply copy the html from the file and paste it into the source code of the footer page. You can then edit the text within the html for your specific company. Ensure that you use the correct footer design for your selected theme.
Important - Always back up the html from your content pages so that that you can quickly revert back to the original design should you encounter issues whilst editing it.